Recording vocals on iOS
Voice Record Pro 7 is a free (ad-supported) app for iOS 7 that supports all the necessary settings to record high-quality vocals with an iPhone.
Open the app and follow the steps below to configure my recommended settings for recording vocals with the camera microphone on the back of the phone:
- Tap on the gear icon to open Options, and tap on
Settings: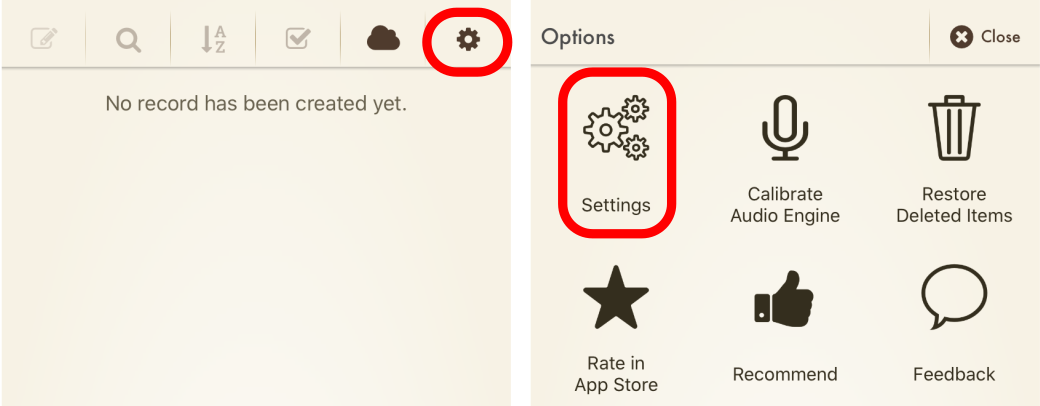
- Tap on
Advanced Recording, change the Record Engine toAdvanced, then tapDone: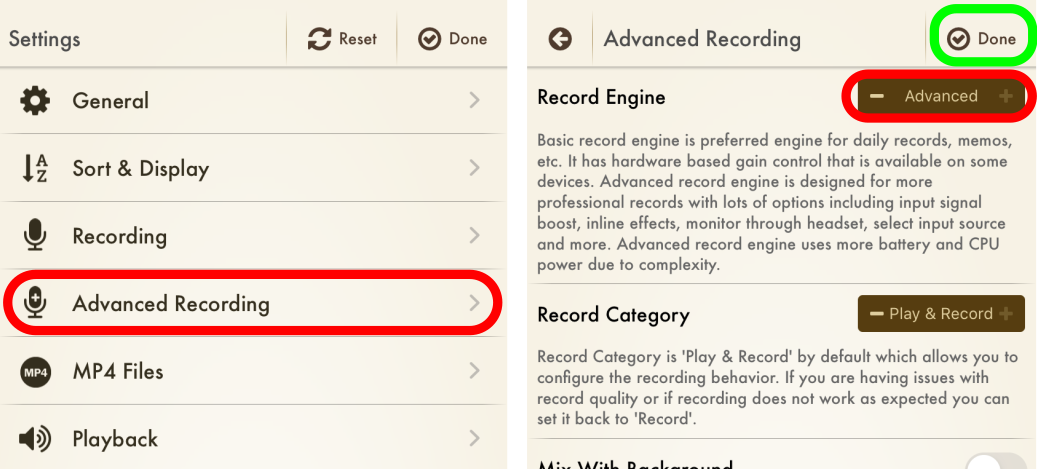
- Back at the main screen, tap on the red
Recordicon to bring up recording settings, and switch to theAdvancedtab to change the recording settings:
- Tap the
Levelsicon (five bars), then change the microphonePositiontoBack: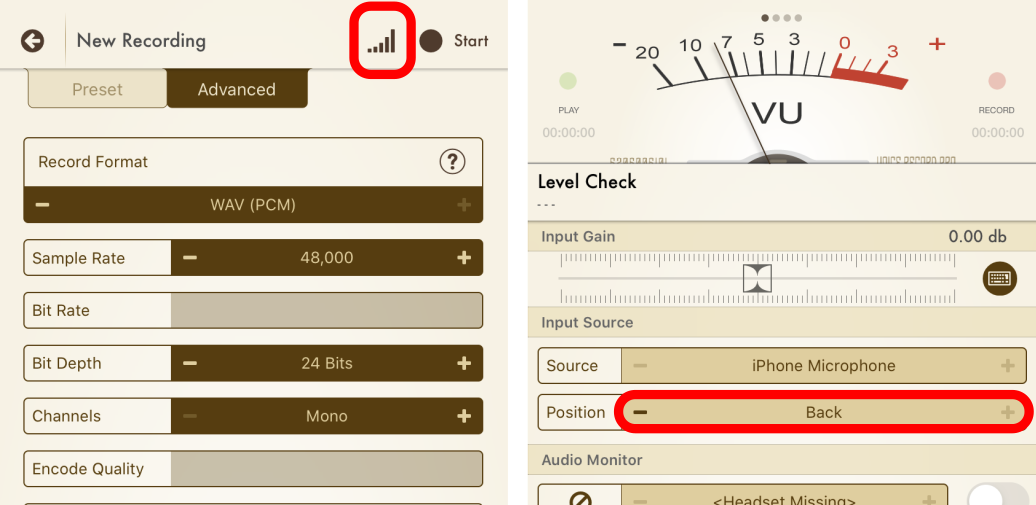
While on this screen, you can adjust your microphone gain by singing fortissimo into the back of your phone (you may need a mirror) while watching the meter. If it goes into the red, reduce the input gain.
- Finally hit the
check markto confirm your settings.
Now you’re ready to record!
- Hit either the
Starticon, or thered record iconto begin: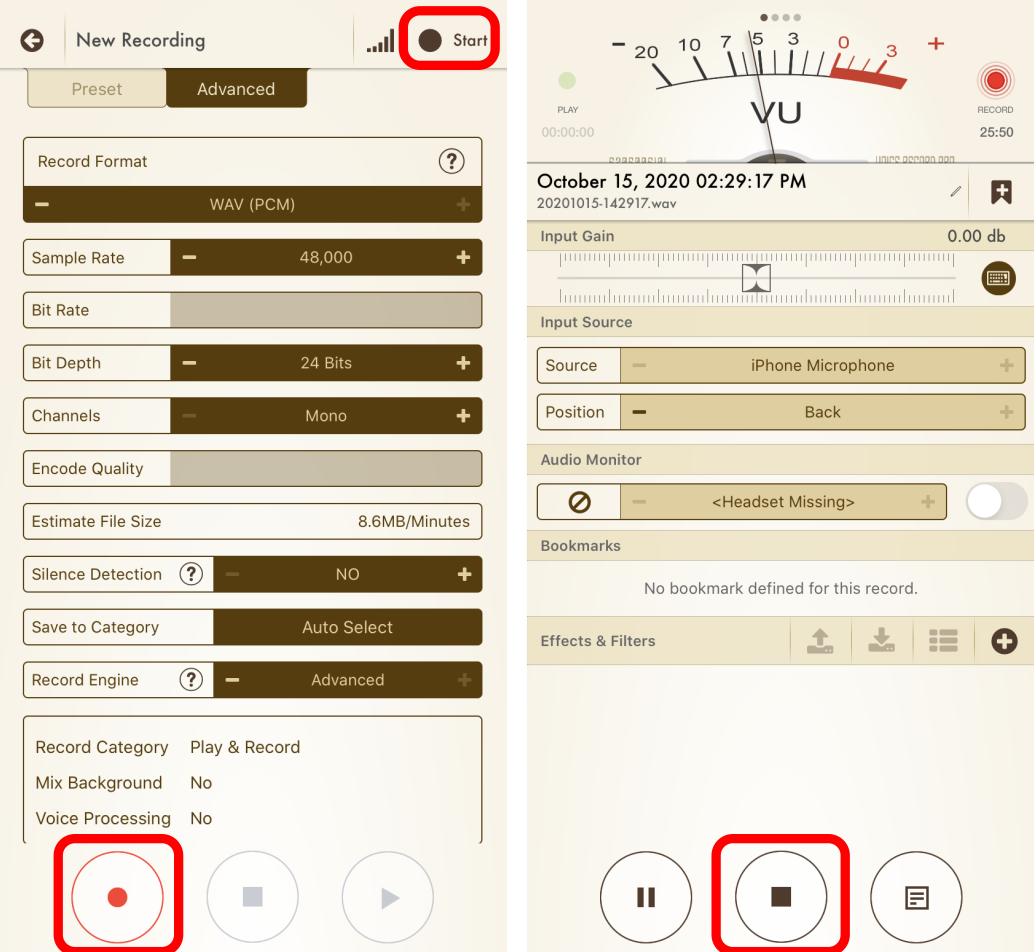
- After you’re done, you’ll see your recording, and options to save it. Tap on the
.wavfilename to rename it, then tapSave to iCloudand then tapUploadto actually upload it toiCloud: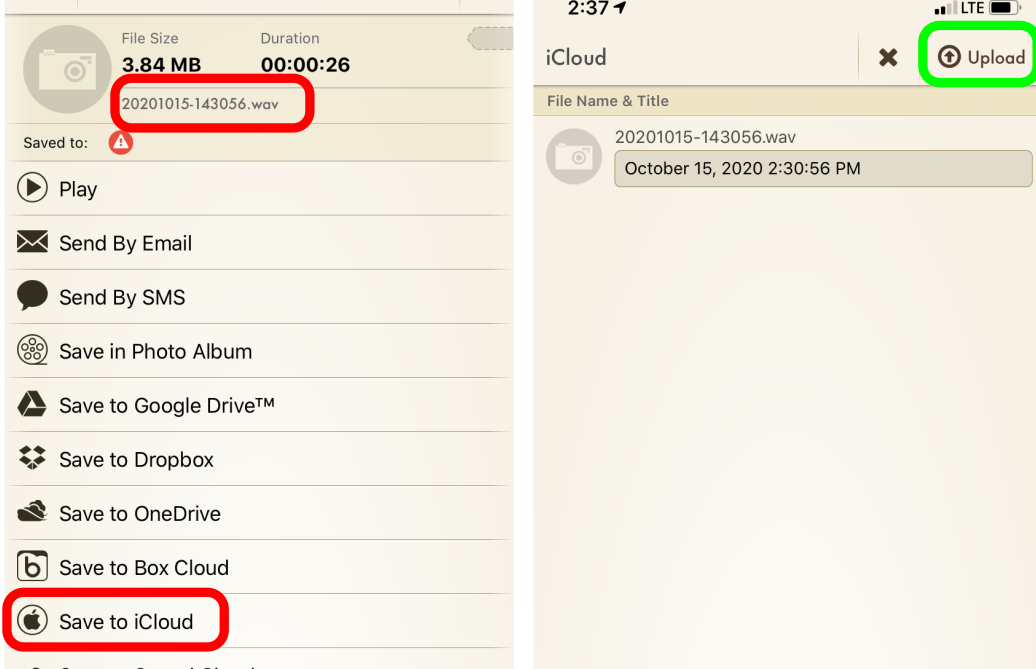
Once you’ve recorded one or more tracks, you’ll have to actually submit it. To do that:
- Open the submission link in Safari, and fill out all the fields.
- Tap
Add files, and chooseBrowse ...from the popup menu. Then tap on theVoice Record Pro 7folder and select the recording you want to upload. Don’t upload the.metafile.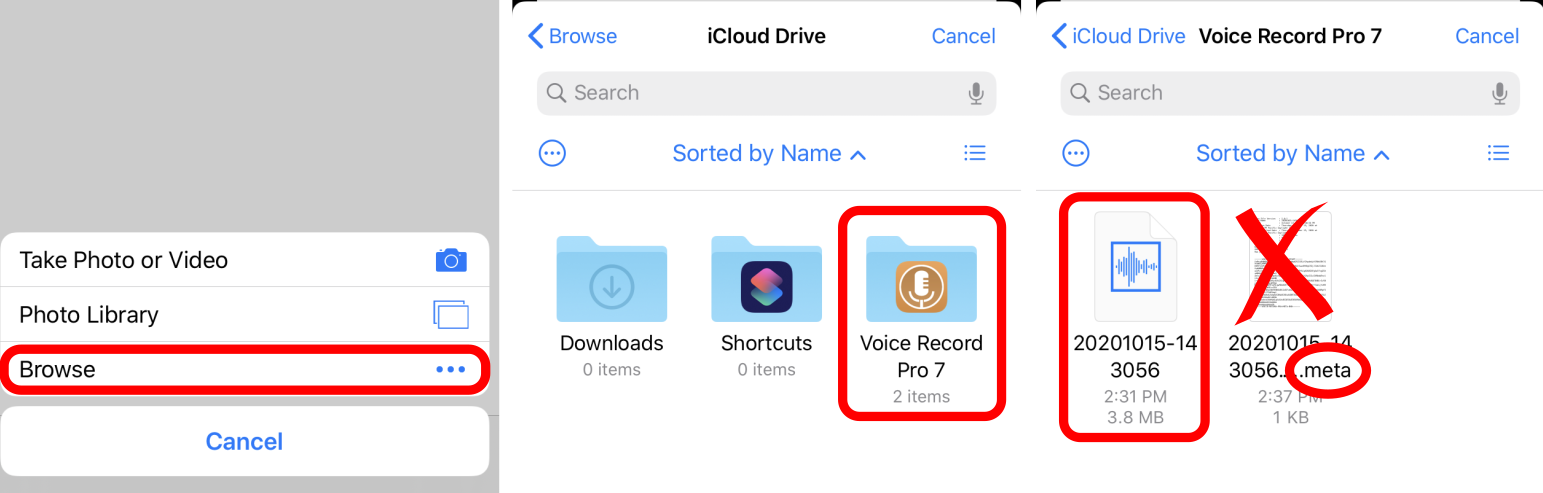
- Repeat 2-4 for any additional files you want to upload.
- Tap
UploadandSubmitto submit your recordings.